
Introduction
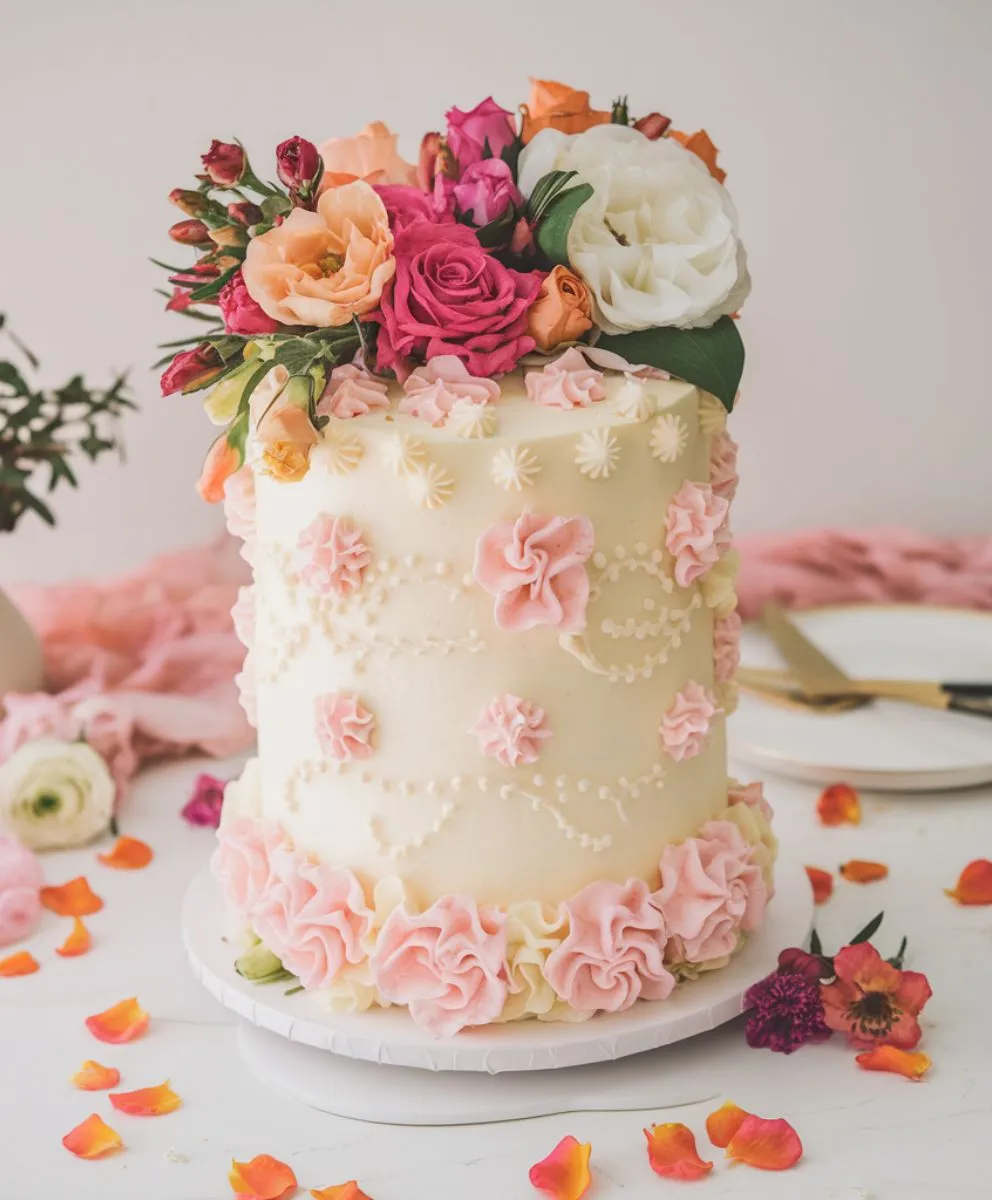
Vintage cake styles have captured many bakers’ attention lately, and it’s easy to see why. Their unique look calls to mind nostalgia and flair, merging classic frosting patterns and bright colors with soft, flavorful cake layers. You might have seen a vintage birthday cake with piped roses, frilly ruffles, or intricate shell borders—all done with a simple piping bag and various piping tips. These designs combine old-school charm with modern creativity, making them fun and eye-catching for birthdays, baby showers, and bridal showers alike.
People often appreciate a beautiful vintage cake because it merges timeless cake-decorating techniques with playful expressions of color and shape. A heart cake, for instance, stands out on a dessert table. The gentle curves of a heart-shaped cake topped with pink buttercream swirls or a lavish ruffle design can give any celebration a sweet centerpiece. Even a more neutral style can look impressive by adding delicate rosettes or swirling borders with a star tip.
This guide will show you how to bake and frost a tender White Velvet Cake, then decorate it with easy buttercream piping tricks. You’ll learn how to create a crumb coat for a smooth surface, how to use a serrated knife to trim cake edges, and how to freeze or chill your layers for easier frosting. From shell border techniques at the bottom of the cake to reverse shells near the top edge of the cake, you’ll gain confidence in piping elaborate decorations. With a little practice, you can craft a showstopping dessert that’s reminiscent of cherished family recipes yet feels refreshingly modern.
Why You’ll Love Vintage Cake
This vintage cake recipe brings together a soft White Velvet Cake with creamy buttercream frosting. You’ll get fluffy cake layers that work perfectly with decorative details like shell borders or ruffles. Because the batter stays tender, it’s easy to bake and slice, and that helps you focus on piping beautiful shapes without worrying about crumbling edges.
If you’re a fan of classic cake decorating, you’ll enjoy using a piping bag and piping tips to create playful accents around the top of the cake and along the sides. Feel free to mix and match designs, such as swirls with reverse shells or a heart-shaped cake with pretty pink buttercream. Even if you’re new to cake decorating, this step-by-step approach shows you how to chill the cake, crumb coat it, and add final buttercream touches until you have a smooth finish ready for vintage flair.
The Vintage cake is great for birthdays, baby showers, and bridal showers. The light crumb of the cake flour pairs well with sweet frosting, so you can serve a slice that’s both soft and rich. A quick chill in the refrigerator for at least half an hour helps keep your buttercream firm, making it simpler to decorate. Whether you’re piping a vintage cake or sticking to round cake layers, this retro look adds charm to any event.
PrintVintage Cake Recipe
Explore the art of vintage cake design with timeless tips and creative decorating ideas that add a nostalgic charm
- Prep Time: 10 minutes
- Cook Time: 40 minutes
- Total Time: 1hour hour 50 minutes( Decorating: 1hour )
- Yield: 8 cups
- Category: Dessert
- Method: Baking
- Cuisine: American
Ingredients
White Velvet Cake Ingredients
14 ounces cake flour: Forms a delicate, tender crumb.
13 ounces granulated sugar: Imparts crystalline sweetness.
1 teaspoon salt: Elevates and balances flavors.
1 tablespoon baking powder & ½ teaspoon baking soda: Create an airy, lofty rise.
5 ounces egg whites, room temperature: Provide essential lightness and structure.
4 ounces vegetable oil: Ensures consistent moisture.
10 ounces buttermilk, room temperature or slightly warm: Adds a subtle tang and enriches the batter.
6 ounces unsalted butter, softened: Merges into a rich, velvety texture.
2 teaspoons vanilla: Infuses a timeless, aromatic finish.
Easy Buttercream Frosting
24 ounces unsalted butter, softened: Forms a luxuriously creamy base.
24 ounces powdered sugar: Establishes a smooth, sweet canvas ideal for piping.
2 teaspoons vanilla extract: Provides warm, inviting fragrance.
½ teaspoon salt: Balances the sweetness delicately.
6 ounces pasteurized egg whites: Contribute a silky, stable structure.
¼ teaspoon salt: Refines the overall flavor profile.
Culinary Harmony
Each ingredient is chosen for its distinct role in enhancing texture, flavor, or structure.
Together, they form a harmonious base for a cake that is both tender and visually captivating, melding classic charm with innovative culinary artistry.
Instructions
Gather all room-temperature ingredients. Precise measurements ensure reliable results. Preheat the oven to 335º F (168º C).
Prepare three 6×2-inch cake pans with your chosen nonstick method. Pour in the batter until each pan is about two-thirds full.
Combine flour, sugar, baking powder, baking soda, and salt in the bowl of a stand mixer. Blend for 10 seconds on low to disperse the dry ingredients uniformly.
In a separate container, stir together half a cup of milk and the oil, then set it aside.
Whisk the remaining milk, egg whites, and vanilla until the eggs break up smoothly. This mixture is later introduced in stages.
Add the softened butter to the dry ingredients. Mix on low until the texture resembles coarse sand. Then pour in the milk-oil blend, allowing the batter to hydrate. Increase the speed to medium for about two minutes to develop structure.
Reduce the speed to low. Add the egg white mixture in three additions, waiting about 15 seconds between each pour. Scrape the sides of the bowl to ensure no unmixed pockets remain.
Transfer the batter into the prepared pans. Bake for 35-40 minutes, or until a toothpick inserted in the center emerges clean. Rap each pan firmly once on the countertop to release steam and prevent excessive shrinking.
Cool the cakes in their pans for 10 minutes before flipping them out. Minor shrinkage is normal. Place each layer on a rack and cool thoroughly. Chill or freeze the layers if preferred for easier handling.
Buttercream Frosting
Place egg whites, powdered sugar, vanilla, and salt into a stand mixer bowl fitted with the whisk attachment.
Whip on high for 5 minutes, allowing the mixture to become glossy and stable.
Lower the mixer speed and slowly incorporate the softened butter in small increments until fully blended.
Increase the speed to high for an additional 5 minutes, ensuring the buttercream transforms into a sweet, airy spread.
Switch to the paddle attachment. Mix on low for 5-15 minutes, creating a silky texture free of air pockets.

Notes
It is vital that each ingredient reaches room temperature. This promotes a cohesive batter and stable frosting. Measuring by weight offers greater accuracy than volume measurements, reducing the risk of a compromised final product. Substitutions can alter the cake’s consistency, so adhere to the recommended ingredients for best outcomes.
Notes
- all components warm enough to blend seamlessly. Buttermilk, butter, and eggs at room temperature reduce the risk of curdling.
- Use a reliable scale. Weighing each item, including liquids, helps the recipe maintain its delicate equilibrium.
- Practice mise en place. Have every element measured and ready to ensure a fluid workflow.
- Chill each cake layer before frosting to enhance stability. A well-chilled cake is simpler to stack, fill, or drape with fondant.
- Avoid swapping out specialized ingredients like cake flour unless the recipe explicitly allows. Even a minor change can shift the entire outcome.
Nutrition
- Serving Size: 1serving
- Calories: 1488kcal
- Sugar: 131g
- Sodium: 794mg
- Fat: 88g
- Saturated Fat: 55g
- Trans Fat: 3g
- Carbohydrates: 170g
- Fiber: 1g
- Protein: 10g
- Cholesterol: 232mg
What do vintage cake taste like?
Vintage cake usually has a moist, soft crumb that feels light but still satisfying. Thanks to ingredients like cake flour and buttermilk, each bite stays tender and slightly tangy, balancing the sweetness of sugar and butter. The buttercream frosting adds another layer of richness—especially when piped thickly with classic designs like shell borders or ruffles. When you take a forkful, you might notice the contrast between airy cake and smooth icing. It’s an old-fashioned flavor many describe as comforting and familiar, making it a popular choice for birthdays, baby showers, and other celebrations where you want a sweet sense of nostalgia.
Ingredients for Vintage Cake
Here’s a quick overview of everything you’ll need to make both the Vintage Cake and the Easy Buttercream Frosting. We’re skipping the exact amounts here, but feel free to refer to your specific recipe card for precise measurements.
Vintage Cake Ingredients
- Cake flour
- Granulated sugar
- Salt
- Baking powder
- Baking soda
- Egg whites (room temperature)
- Vegetable oil
- Buttermilk (room temperature or slightly warm)
- Unsalted butter (softened)
- Vanilla
Easy Buttercream Frosting
- Unsalted butter (softened)
- Powdered sugar
- Vanilla extract
- Salt
- Pasteurized egg whites
All of these simple components come together to create a soft, Vintage Cake and a frosting that’s perfect for piping. Having everything at the right temperature helps ensure your cake batter mixes evenly, and your buttercream whips up smooth for those vintage-style decorations.
How To Prepare Your Cakes
Follow these steps to set up your cake layers so they’re firm, level, and ready for vintage-style piping.
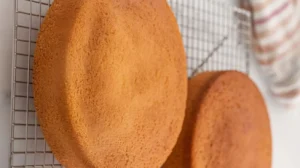
- Bake Your Round Cake Layers:
- Use two round cake pans. Once done, let the cakes cool completely on a rack. Cooling prevents the buttercream from melting when you frost.
- Prepare Your Buttercream:
- Whip up the frosting and color it if you like. A pastel pink buttercream is popular for vintage cakes, but any color works.
- Chill or Freeze the Cakes:
- Place the cooled layers in the freezer for about an hour or wrap them in plastic and refrigerate overnight. This makes them sturdy and easier to trim and frost.
- Trim the Brown Edges:
- Use a serrated knife to remove the top dome and any dark edges. This step creates smooth surfaces for stacking and makes the cake look neat once decorated.
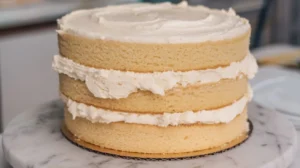
- Fill the Layers:
- Choose your filling—extra buttercream, jam, or whatever you love. Spread it evenly across one cake, then place the second cake on top.
- Apply a Thin Layer of Buttercream (Crumb Coat):
- Coat the entire cake with a thin layer of buttercream. This locks in loose crumbs. Chill the cake in the refrigerator for at least half an hour to let the frosting firm up.
- Final Coat of Buttercream:
- Spread a thicker, final layer of buttercream over the crumb coat. Use an offset spatula to smooth the surface of the cake. Aim for a clean finish so your decorations look crisp.
- Your Perfect Canvas:
- At this point, your cake is primed and ready for vintage-style piping—shell borders, ruffles, or any other intricate designs you dream up.
How To Make a Vintage Cake Step by Step
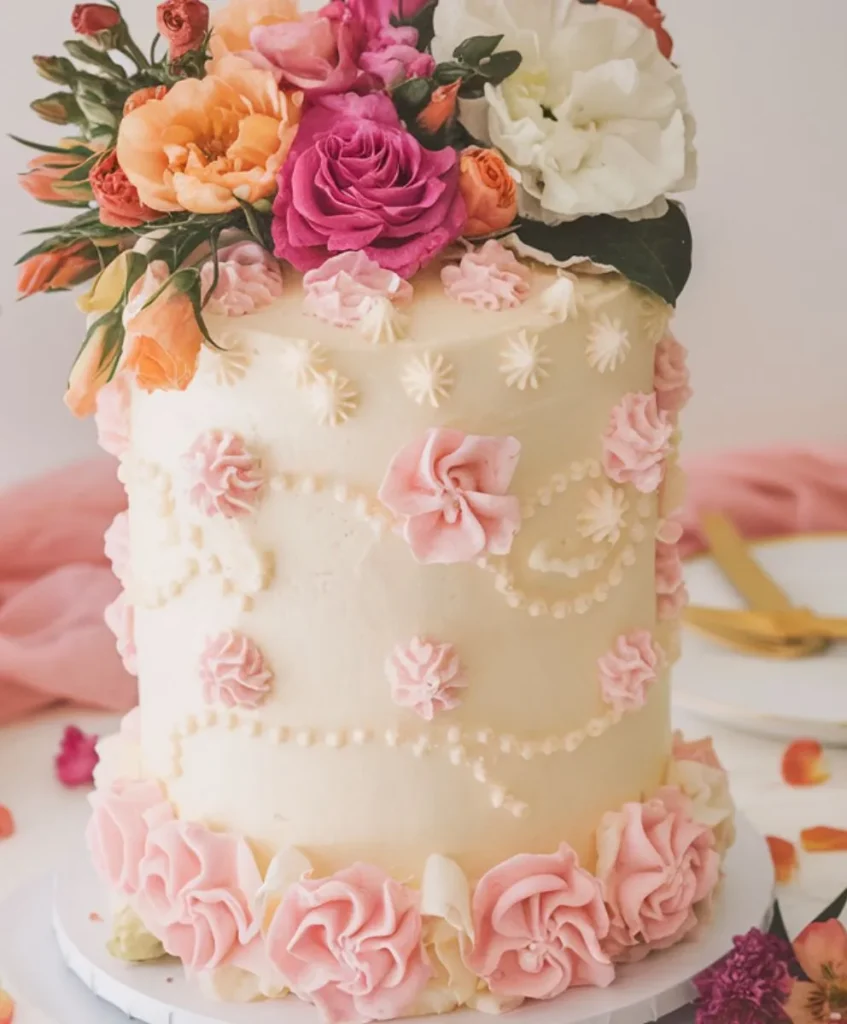
To achieve a nostalgic look for your vintage cake, layer your buttercream accents. Begin with larger piping tips to create a bold base, and then work your way to smaller tips for delicate details.
- Smooth Buttercream:
- Make sure your buttercream is bubble-free and creamy. An immersion blender helps remove air pockets. This way, your piped shapes stay neat.
- Set Up the vintage cake:
- Place your chilled cake onto a sturdy cake board. Ensure the cake sits evenly in the center, giving you enough space to pipe around the edges.
- Mark Your Guides:
- Use a round cutter or a paper template to mark spaces around the top third and bottom third of the cake. Each marking should be about three inches wide. These lines help you place ruffles or shell borders in neat, even circles.
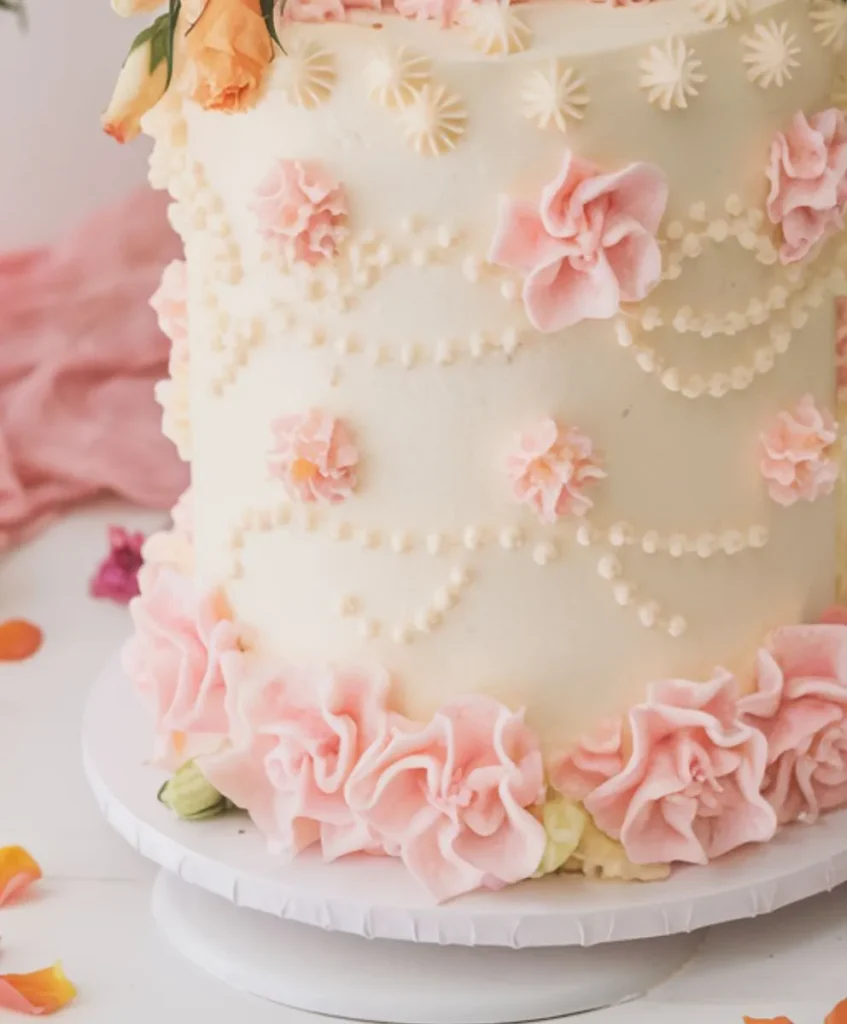
- First Piped Border:
- Attach a 1M piping tip to your piping bag. Hold the bag at a 45-degree angle and squeeze the piping bag in a steady motion to create a shell border around the bottom of the vintage cake and along the top edge of the cake. Relax pressure as you pull the bag toward you to form a smooth tail at the end of each shell.
- Add a Reverse Shell:
- Switch to an open star tip (Wilton 18). Pipe a reverse shell just above the bottom border and just below the top border. This pattern curves in the opposite direction of a classic shell, adding more vintage charm. Keep the bag at a 45-degree angle and squeeze gently, then lower the tip and pull the bag toward you to complete each swirl.
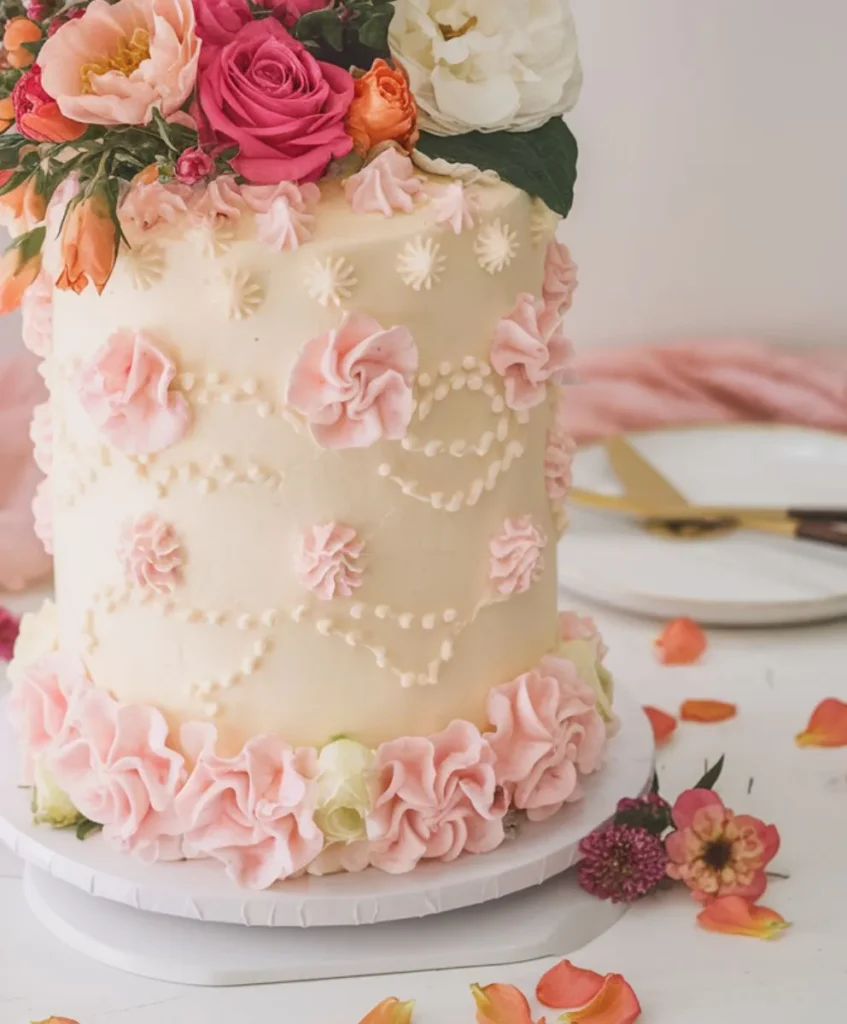
By stacking larger accents first and smaller details later, you’ll see the classic “layered” effect that makes Vintage cake so eye-catching. Feel free to experiment with pink buttercream or other shades to match birthdays, baby showers, or bridal showers. With each step, your cake becomes a beautiful vintage centerpiece you’ll be proud to share.
Serving and Storing Vintage Cake
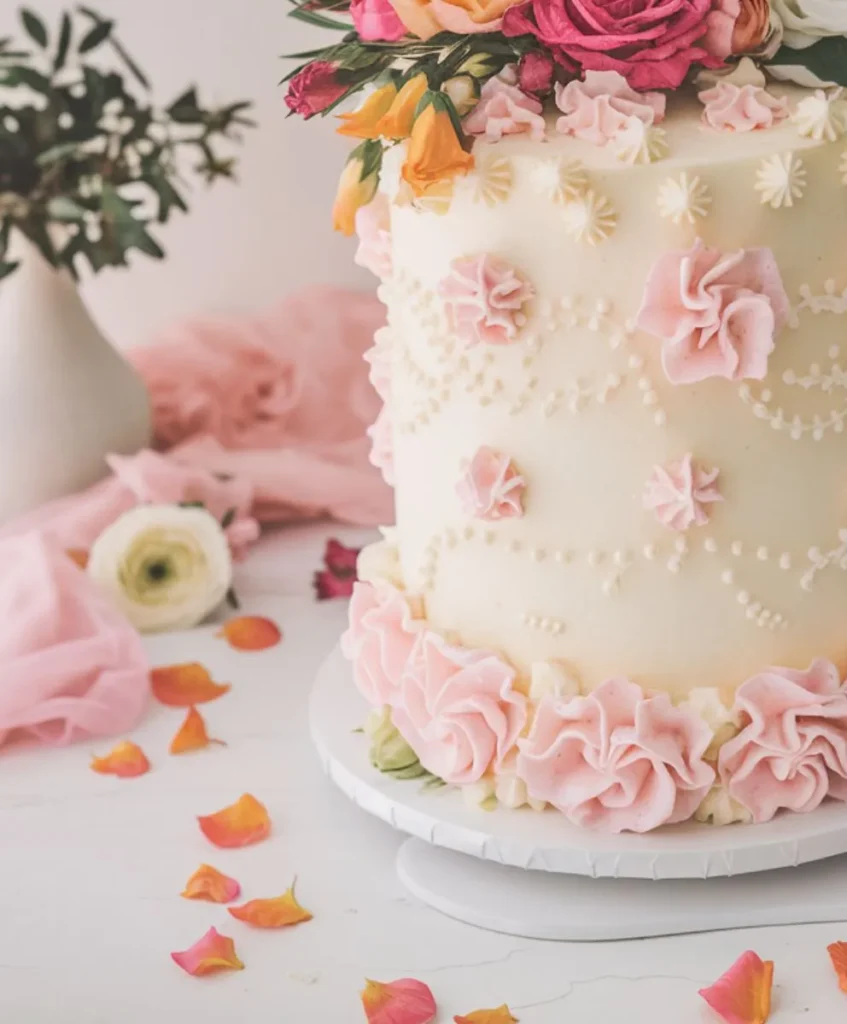
After all your careful piping, it’s time to show off your vintage cake. Place the cake on a pretty stand or platter, so guests can see the piped borders from every angle. If you’re serving at a birthday party or another celebration, let the buttercream come to room temperature for a soft bite. Use a long, serrated knife to slice neat portions—slightly warmed blades help cut through the buttercream smoothly.
For storage, you can cover leftover slices and keep them at room temperature for a day or two. If the weather is warm or you’ve used perishable fillings, place the cake in the refrigerator for at least one hour to keep the buttercream firm and the flavors fresh. Wrapped in plastic or stored in an airtight container, it stays moist for several days. When you’re ready to enjoy another slice, let it sit out briefly to soften the frosting before digging in.
Common Mistakes to Avoid
When decorating a vintage cake, watch out for these pitfalls to ensure your final creation looks as good as it tastes:
- Skipping the Chill:
Avoid frosting a warm cake. Freeze or refrigerate your layers and crumb coat for at least an hour to keep the buttercream firm. - Inconsistent Trimming:
Uneven edges can spoil your cake’s appearance. Use a serrated knife to trim the cake layers evenly. - Missing the Crumb Coat:
A thin layer of buttercream is essential to lock in crumbs. Without it, your final coat can look messy. - Buttercream Troubles:
Buttercream that is too soft won’t hold shapes well; too stiff makes piping hard. Aim for a smooth, bubble-free consistency. - Rushing the Process:
Steady, controlled movements are key when piping. Practice holding the piping bag at a 45-degree angle with consistent pressure to create neat designs. - Using the Wrong Piping Tips:
Vintage designs depend on specific tips like the Wilton 1M for shell borders or an open star tip for reverse shells. Double-check your tools before you start. - Over-Decorating:
Keep the design balanced by sticking to a few key elements rather than overcrowding the cake with too many details.
Frequently Asked Questions
What buttercream is best for vintage cake?
The best buttercream for vintage cake is a sturdy American buttercream. Its firm consistency helps maintain intricate piping details, making it perfect for shell borders, ruffles, and other classic vintage accents.
What is the difference between French buttercream and classic buttercream?
French buttercream is made with egg yolks, resulting in a richer flavor and a lighter texture. In contrast, classic American buttercream uses egg whites, producing a sweeter, more stable frosting that’s ideal for detailed piping work.
What is the easiest buttercream to work with?
Classic American buttercream is the easiest to work with. Its thick, smooth consistency allows for effortless piping and is forgiving enough for beginners when creating vintage designs.
Can you leave a buttercream frosted cake out overnight?
It’s best to refrigerate a buttercream-frosted cake if it won’t be served within a few hours. Leaving it out overnight, especially in warm conditions, may cause the frosting to soften or melt. In a cool room, a short period is acceptable, but refrigeration is recommended to maintain the design’s integrity.
Conclusion
This vintage cake recipe blends classic techniques with modern flavors to create a dessert that stands out. From soft, tender White Velvet Cake layers to stunning buttercream accents, each step builds on timeless methods and adds a personal touch. The clear guidelines make it easy to master piping techniques like shell borders and reverse shells, ensuring your vintage cake looks as beautiful as it tastes.
For those seeking a unique twist, this recipe can be adapted into a Vintage Heart Cake recipe. With subtle modifications to the cake shape and design, you can craft a heart-shaped cake that adds a romantic, nostalgic flair to your celebrations.
Following these steps—from chilling the cake and applying a crisp crumb coat to a final smooth layer of buttercream—guarantees a finished product that will impress at birthdays, baby showers, bridal showers, and more. With practice and careful attention to detail, you’ll confidently replicate this vintage look every time. Enjoy the creative process, experiment with your favorite buttercream colors, and remember that every cake is a canvas for your creativity. Happy baking!
Leave a comment
Your email address will not be published. Required fields are marked*