
Introduction
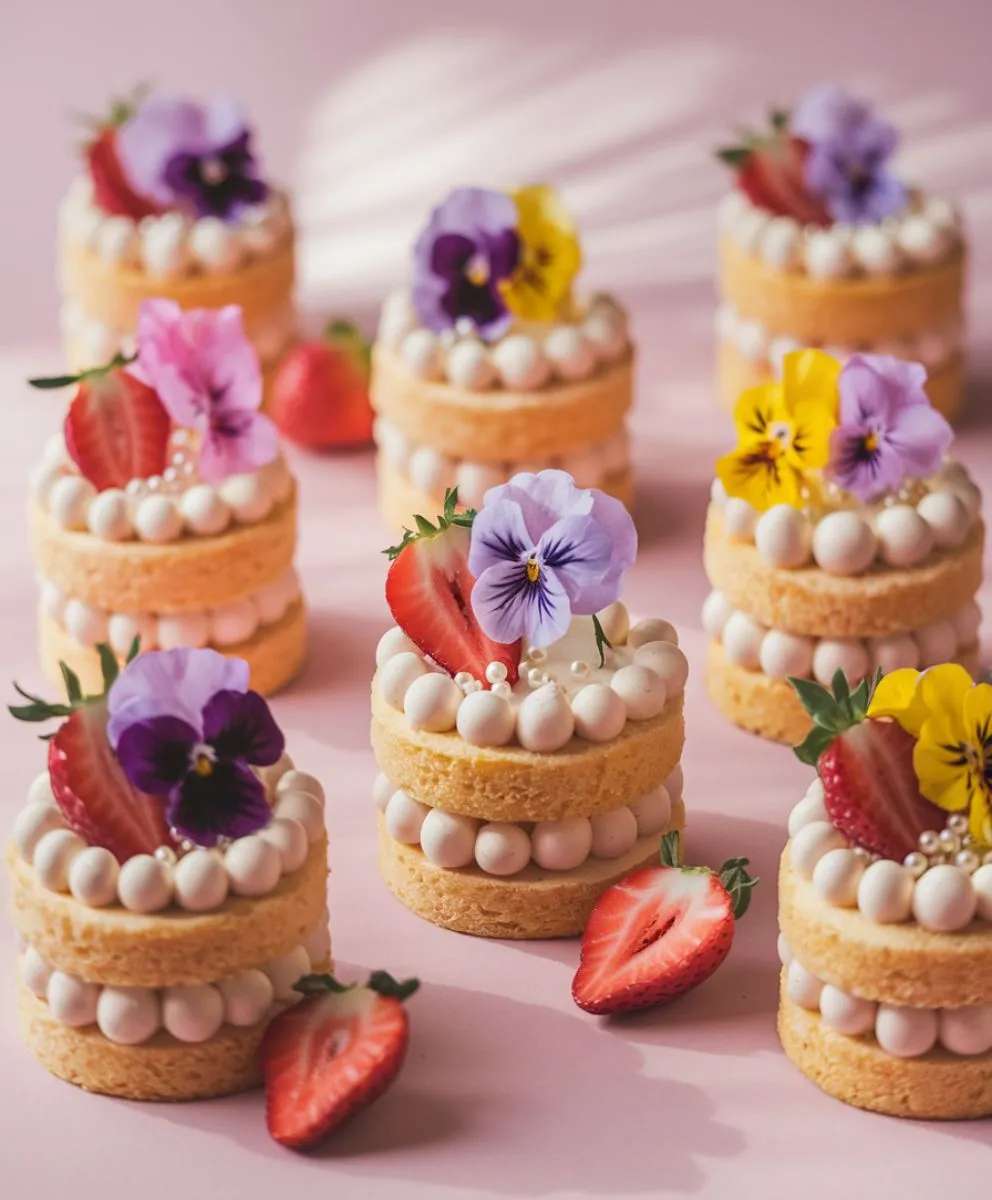
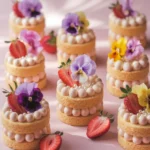
Mini cakes are the perfect blend of charm, practicality, and indulgence. Their petite size makes them ideal for any occasion, from weddings to casual gatherings, offering elegance without the fuss of serving full-sized cakes. Self-contained and easily customizable, they allow for endless creativity in decoration and flavor combinations—think delicate buttercream flowers, fresh fruit, or shimmering edible glitter.
Their versatility shines in their ability to suit any theme or event, whether as part of a dessert table or as individual treats for guests. With flavors ranging from classic vanilla to bold lemon or rich red velvet, mini cakes cater to diverse tastes while maintaining their sophisticated allure.
Perfect for intimate gatherings, they provide just the right portion without the guilt of oversized servings. Mini cakes are more than just desserts; they’re delightful moments of joy, designed to impress and create lasting memories.
What You’ll Need to Make Mini Cakes
Mini cakes are an elegant, fun, and versatile way to celebrate any occasion. Whether you’re creating a whimsical dessert table for a wedding, a birthday, or simply indulging in a personal treat, these miniature delights are sure to impress. Here’s a comprehensive guide to what you’ll need to make these bite-sized cakes that are perfect for any event.
- Baked and Cooled Sheet Cake (Recipe to Follow)
The foundation of any mini cake begins with a perfectly baked sheet cake. This sheet cake serves as your canvas, providing both flavor and structure. Choose a cake recipe that is moist yet firm enough to withstand the cutting and layering process. Classic options like vanilla, chocolate, or even red velvet are always crowd-pleasers, but feel free to experiment with flavors such as lemon, carrot, or coconut.
The key to a successful mini cake starts with ensuring your sheet cake is properly cooled before assembly. A cake that is still warm can crumble or distort when you try to cut it into rounds. After baking, let the cake cool completely on a wire rack to preserve its shape and texture. Once cooled, you can move forward with the fun part: shaping it into beautiful mini cakes.
- Buttercream of Choice (Like This Easy Whipped Buttercream Frosting)
The star of any cake is the frosting, and buttercream takes center stage here. Rich, creamy, and endlessly customizable, buttercream serves as the perfect complement to your mini cakes, providing both sweetness and texture. Whether you opt for classic American buttercream, a silky Swiss meringue buttercream, or an airy whipped buttercream, the choice is yours.
For an easy and quick buttercream, try a whipped version that is light and fluffy, yet holds its shape beautifully. This type of buttercream will pipe effortlessly and cover your mini cakes with a smooth, velvety finish. Be sure to whip your butter and powdered sugar until they form stiff peaks, adding a splash of vanilla extract for depth of flavor. If you want to add color, consider using gel food coloring to create vibrant hues that match the theme of your event.
- Round Cookie Cutter – 2 to 3-Inches in Diameter
To give your mini cakes that perfect round shape, a round cookie cutter is indispensable. The size of the cutter will determine the diameter of your mini cakes, and a 2 to 3-inch cutter is ideal for creating petite, individual servings that are easy to eat and serve.
When using the cutter, press it firmly into the cooled sheet cake to create precise circles. Depending on the thickness of your cake, you may need to press down gently but firmly to ensure you cut all the way through. After cutting, lift the mini cake rounds with a spatula and set them aside for assembly. You can gather any leftover cake scraps and repurpose them for cake pops, or crumble them into a decorative topping for your cakes.
- Piping Bag or Offset Spatula
The application of buttercream is where the artistry of mini cakes truly comes to life. Whether you’re a seasoned cake decorator or just starting out, a piping bag or an offset spatula will be your best friend during this process.
A piping bag fitted with a decorative tip allows you to create beautiful swirls, rosettes, and intricate patterns with ease. If you prefer a smoother finish, an offset spatula can help you spread the buttercream evenly across each layer, giving your mini cakes a polished, professional appearance. For a more textured finish, try using the spatula to create soft peaks or to achieve a rustic, whipped appearance.
Whichever tool you choose, the key is to layer your buttercream carefully between each cake round and on top, making sure each layer is even and aesthetically pleasing.
- Fresh Flowers
Fresh flowers not only add a touch of elegance to your mini cakes, but they also bring a burst of color and natural beauty that makes them irresistible. Whether you opt for delicate edible flowers like pansies or violets, or larger blooms such as roses and dahlias, fresh flowers can elevate your dessert from simple to stunning.
Before using flowers on your mini cakes, make sure they are pesticide-free and safe for consumption. Be sure to remove any leaves or stems that could come into contact with the frosting, and place the flowers directly on top of the cakes for a delicate, artful finish. The vibrant colors and textures of the petals will contrast beautifully with the smooth buttercream, creating a visually striking treat.
- Sprinkles or Other Edible Decorations (Meringue Kisses, Fruit, Candied Nuts, etc.)
To add a touch of whimsy and extra flavor to your mini cakes, consider decorating with sprinkles or other edible decorations. From pastel-colored confetti sprinkles to metallic gold leaf, the options are endless. These small additions can take your mini cakes from charming to dazzling in just a few sprinkles.
If you want to enhance the flavor profile of your mini cakes, think about incorporating fruit, meringue kisses, or candied nuts. Fresh berries like raspberries or blueberries add a refreshing contrast to the rich buttercream, while meringue kisses bring a delightful crunch and sweetness. Candied nuts, such as pistachios or almonds, can add a savory crunch that beautifully balances the richness of the cake and frosting. These decorative touches not only make the cakes visually appealing, but they also create layers of flavor that will leave guests wanting more.
Steps for How to Make Mini Layer Cakes
Mini layer cakes are a fun and elegant way to enjoy a personal-sized treat. Whether for a special occasion or a sweet indulgence, these bite-sized cakes are both delightful and delicious. Here’s how to make them with ease.
1. Bake, Cool, and Trim the Sheet Cake
Begin by baking your cake and allowing it to cool all the way down. Once cooled, check if the cake has a dome. If so, use a serrated knife to trim it down, creating a flat, even surface for layering.
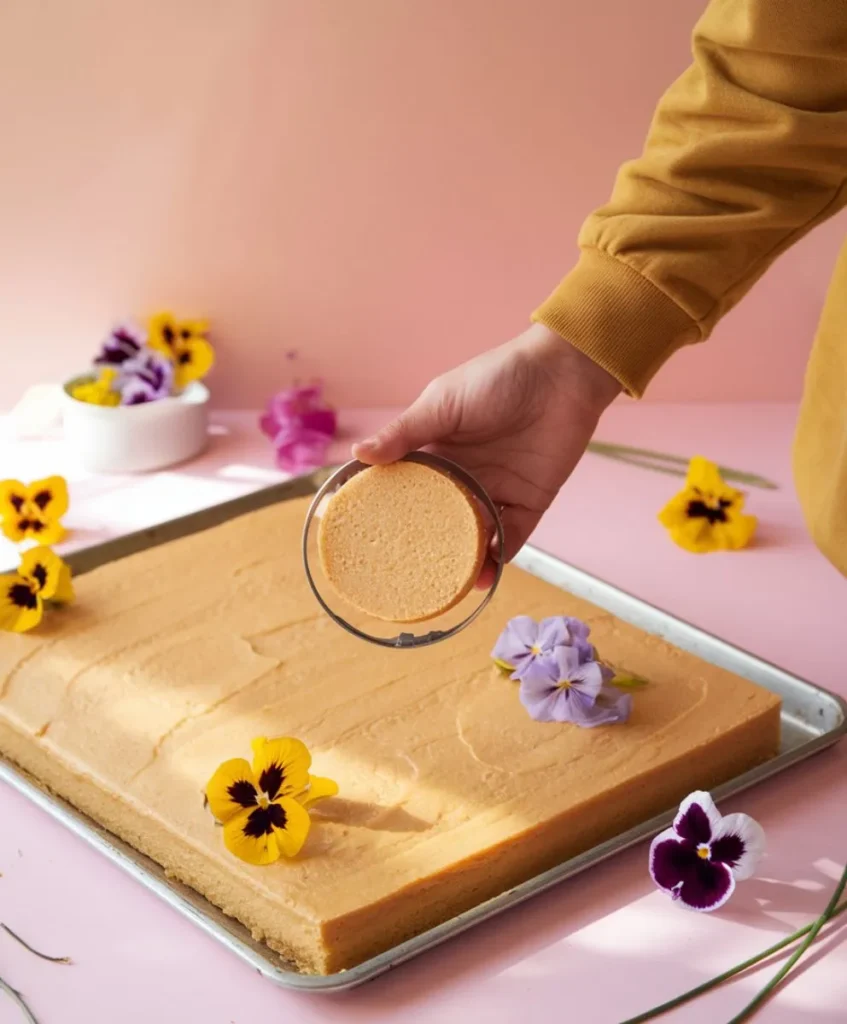
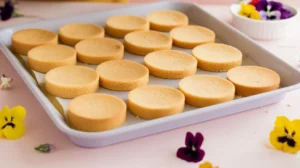
2. Cut Round Layers with a Cookie Cutter
Use a 2 to 3-inch round cookie cutter to cut out cake rounds from the sheet. You should be able to get at least 12 rounds from a ¼ sheet cake. Score the cake before cutting to ensure the rounds fit evenly and press the cutter down gently to avoid squashing the cake.
3. Fill a Piping Bag with Buttercream
Fill a piping bag with your choice of buttercream. Pipe a generous swirl of frosting onto half of the cake rounds, then place the remaining plain rounds on top, creating mini two-layer cakes.
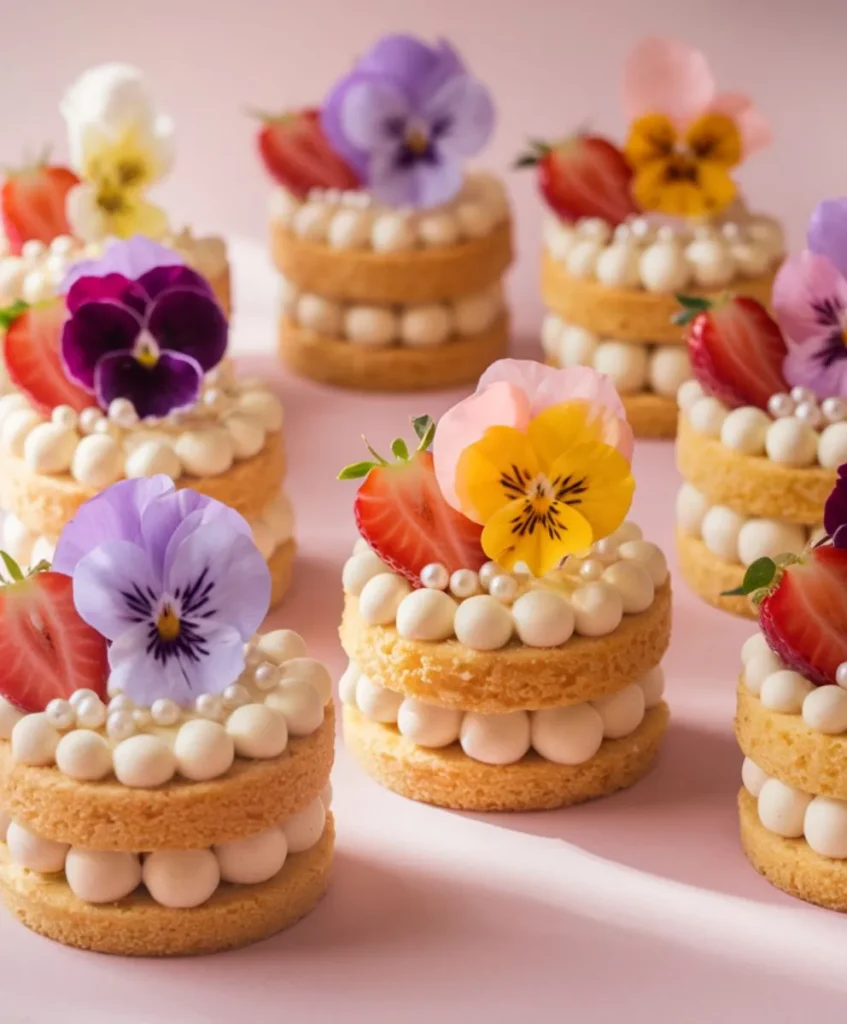
4. Pipe Frosting on Top or Decorate
Pipe more frosting onto the top of each mini cake. You can choose a smooth finish, create rosettes, or add textured patterns. Get creative with your frosting to suit your style.
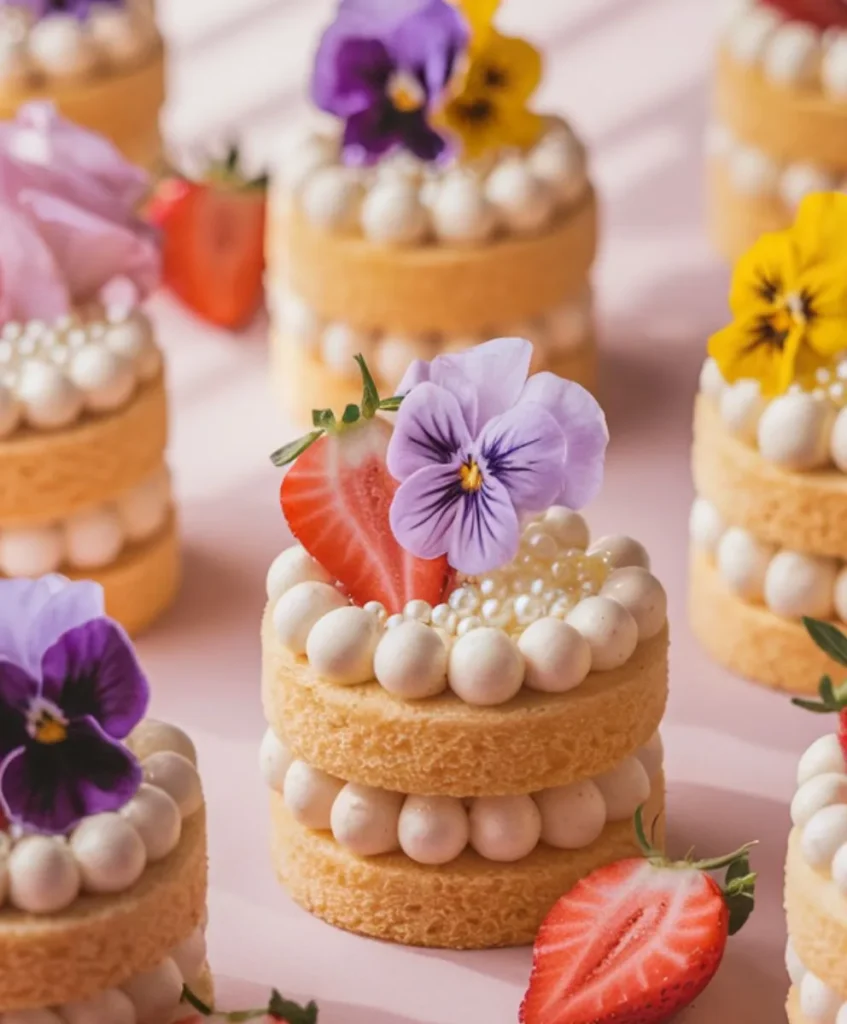
5. Top with Decorative Elements
Finish off the cakes by adding fresh flowers, mini strawberries, herbs, meringue kisses, or candied nuts. These toppings not only enhance the look but can also complement the flavors of the cake, especially if you’ve used fillings like jam or lemon curd.
Creative Cake Decorating Ideas
Decorating mini cakes is a fun and creative way to personalize your desserts. Whether you’re going for elegance, whimsy, or rustic charm, these simple decorating ideas can elevate your cakes with minimal effort.
– Fresh Flowers: Fresh, edible flowers like roses, lavender, and daisies add natural beauty and elegance to mini cakes. Choose a mixed bouquet and disassemble it to create unique, coordinated designs with similar colors and textures.
– Sprinkles: Custom sprinkle mixes, combining sugar pearls, colorful sprinkles, and quins, add a playful touch. Tailor the mix to suit any occasion for a celebratory look.
– Meringues: Delicate French meringue kisses add a light, airy feel to your mini cakes. Their crisp texture contrasts beautifully with rich buttercream, creating an elegant, whimsical finish.
– Buttercream: Pipe intricate designs like flowers, swirls, or rosettes using buttercream. Play with different colors and textures to add depth and elegance to your cakes.
– Herbs: Fresh herbs like rosemary, thyme, or mint provide a fragrant and natural look, adding a rustic touch to your mini cakes.
– Candied Nuts: Candied nuts bring crunch and sweetness, creating a delightful contrast with soft cakes and creamy frosting.
– Lemon Wedges or Fresh Berries: Fresh fruit like lemon wedges or berries adds color, flavor, and a refreshing twist to your mini cakes.
Delicious Variations for Mini Cakes
Mini cakes are wonderfully versatile and can be adapted to suit a variety of flavors and occasions. Whether you’re working with a classic chocolate base or experimenting with unique fillings and frostings, there’s no limit to the creative combinations you can achieve. Below are some enticing variations to inspire your next batch of mini cakes.
1. Chocolate Mini Cakes
Rich and decadent, chocolate mini cakes are a timeless favorite. To create these, bake a luscious chocolate sheet cake as your base. For frosting, you can’t go wrong with classic vanilla buttercream to provide contrast, or opt for indulgent fudge frosting for a double dose of chocolatey goodness. If you’re not planning to make a full sheet cake, simply halve the recipe to create a quarter sheet that yields plenty of mini cake rounds. The result is a dessert that feels simultaneously luxurious and comforting.
2. Lemon Mini Cakes
Bright and tangy, lemon mini cakes are the epitome of refreshment in dessert form. To craft these, start with a zesty lemon-flavored sheet cake or a plain vanilla base. For the filling, pipe a ring of buttercream around the outer edge of the cake round to create a barrier, then fill the center with silky lemon curd. This technique not only prevents the curd from spilling over but also balances the tartness with the creamy sweetness of the buttercream. Garnish with a sprinkle of lemon zest or a small candied lemon slice for an elegant finish.
3. Strawberry Mini Cakes
Sweet and fruity, strawberry mini cakes bring a delightful pop of flavor and color to any dessert table. Begin with a light vanilla or strawberry-flavored sheet cake. For the filling, use the same method as with lemon cakes: pipe a buttercream ring around the edge and fill the center with strawberry jam. The jam adds a burst of natural sweetness and a beautiful red hue that contrasts beautifully with the buttercream. Top each cake with a fresh strawberry slice or a dollop of whipped cream for a charming presentation.
4. Flavored Buttercream
Take your mini cakes to the next level with uniquely flavored buttercream frostings. A simple vanilla cake can be transformed with creative frosting choices that cater to different tastes:
- White Chocolate Frosting: Add a luxurious, creamy sweetness that pairs beautifully with both chocolate and vanilla cakes.
- Raspberry Frosting: Use fresh raspberries or raspberry preserves to create a buttercream with a vibrant pink color and tangy sweetness.
- Chocolate Nutella Buttercream: Combine the richness of chocolate with the nutty sweetness of hazelnut for a frosting that’s downright addictive.
- Peanut Butter Frosting: A perfect pairing for chocolate mini cakes, peanut butter frosting adds a salty-sweet element that elevates the overall flavor profile.
Top Tips for Perfect Mini Cakes

Creating mini cakes is a fun and rewarding process, but achieving that flawless presentation can sometimes take a little finesse. Whether it’s matching up uneven cake rounds or adjusting the thickness of the layers, these tips will help ensure your mini cakes are both beautiful and delicious.
1. Match Uneven Cake Rounds by Twisting for a Flat Top
When cutting your cake rounds, it’s common for some layers to have slight unevenness, especially if the cake didn’t bake perfectly flat. Don’t worry—there’s a simple way to remedy this. When pairing the rounds to create your mini cakes, carefully pick two that are slightly uneven and match them by twisting the tops. By rotating them around, you can align the flatter parts of each layer, making the very top of the cake perfectly level. This technique helps create a neat, symmetrical look, ensuring your mini cakes don’t appear lopsided, even if they’re not cut with perfect precision.
2. Bake Thinner Layers for Smaller Cakes
The recipe for mini cakes creates a rich, thick cake that’s perfect for standard-sized layers. However, if you’re looking to make even smaller mini cakes, thinner layers might be a better option. For this, consider baking in a larger pan to spread the batter out more evenly. A thinner layer will give you a more delicate cake, making each bite even lighter. Once baked, you can use a 1 ½-inch round cutter to punch out your mini rounds.
Using a smaller cutter on a thick, dense cake often results in uneven edges or difficulty cutting clean rounds. By adjusting the layer thickness, you ensure the mini cakes maintain their shape and texture while still having that soft, melt-in-your-mouth quality. Remember to keep an eye on the bake time, as thinner layers will cook more quickly than a thicker batter.
3. Adjust the Bake Time for Thinner Layers
When you bake thinner layers of cake, the cooking time will differ from the original recipe. Since the batter is spread more thinly, it will bake faster. To avoid overbaking or drying out the cake, start checking for doneness a few minutes earlier than the original suggested bake time. Insert a toothpick into the center of the cake rounds—if it comes out clean, the layers are done. Keep in mind that thinner layers can dry out quickly, so be careful not to overbake them. It’s better to slightly underbake and allow them to finish cooking as they cool, keeping them soft and tender.
Serving and Storage Tips for Mini Cakes
Mini cakes are an indulgent treat that bring a sense of joy and elegance to any occasion. However, because of their delicate texture and exposed layers, proper serving and storage are key to ensuring they remain fresh and flavorful. Here’s how to serve and store your mini cakes for the best results.
- Serve the Mini Cakes the Same Day They Are Assembled
The beauty of mini cakes lies not only in their appearance but also in their texture. These little cakes are wonderfully moist, thanks to the perfect balance of ingredients. However, that moistness can quickly lead to a less-than-optimal texture if the cakes are stored improperly. Since the sides of the mini cakes are exposed and lack the protective frosting layer typically found on larger cakes, they are more vulnerable to drying out.
For the best experience, it’s recommended to serve the mini cakes on the same day they are assembled. This ensures they maintain their soft, tender crumb and vibrant frosting. As the cakes sit, the exposed edges can start to absorb moisture from the air, losing some of that just-baked freshness. To keep them at their peak, aim to serve them shortly after they are decorated and stacked.
- Storage Tips for Mini Cakes
If you find yourself with leftovers or need to prepare the cakes ahead of time, there are a few ways to preserve their freshness. While it’s best to enjoy mini cakes the day they’re made, they can be stored for up to two days if needed. To maintain their moisture, store the cakes in an airtight container or cover them loosely with plastic wrap. This will help prevent the cake from drying out and preserve its delicate texture.
If you have to store them for longer than two days, consider refrigerating the cakes to extend their shelf life. However, be aware that refrigeration can sometimes alter the texture, making the cakes slightly denser. If you do refrigerate, bring the cakes back to room temperature before serving to help restore some of their original lightness.
- Protecting the Cakes During Storage
To protect the integrity of the frosting and decorations, especially if your mini cakes are adorned with delicate toppings like fresh flowers or sprinkles, store them in a cool, dry place. Avoid storing them in areas where they could be exposed to heat or humidity, as this could cause the frosting to melt or soften too much.
If you must store cakes with intricate decorations, consider using a cake carrier or covering the cakes with a dome to protect them from damage. This will help preserve the look and taste of your mini cakes, ensuring they remain as delicious as when they were first made.
PrintMini Cakes recipe
Explore the charm of mini cakes with creative flavors and decorations. Perfect for any occasion, these bite-sized treats are versatile and easy to customize.
- Prep Time: 10 mins
- Cook Time: 25 mins
- Total Time: 35 mins
- Yield: 8
- Category: Dessert
- Method: Oven Baked
- Cuisine: American
Ingredients
2 ¼ Cups All-Purpose Flour: Provides structure for a tender crumb. Sift for best results.
2 Teaspoons Baking Powder: Ensures the cakes rise light and fluffy.
½ Teaspoon Kosher Salt: Enhances sweetness and balances flavors.
½ Cup Unsalted Butter: Adds richness and moisture; use at room temperature.
1 ½ Cups Granulated Sugar: Sweetens and aerates the batter for a soft texture.
¼ Cup Canola or Vegetable Oil: Keeps the cakes moist and tender.
3 Large Eggs: Binds ingredients and adds structure.
2 Teaspoons Pure Vanilla Extract: Infuses the cakes with warm, aromatic flavor.
1 Cup Milk: Adds moisture and creaminess; use at room temperature.
Instructions
Preheat your oven to 350°F (175°C). Line a 9 X 12-inch baking pan with parchment paper to prevent sticking and ensure easy removal after baking.
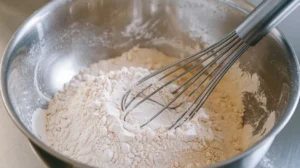
In a spacious mixing bowl, combine the flour, baking powder, and salt using a whisk. This ensures even distribution of the dry ingredients for a smooth, well-risen cake.
With an electric mixer, cream the softened butter and sugar together until the mixture is light and airy. Add oil and mix for another minute until pale and aerated. Scrape down the bowl to ensure everything is fully mixed.
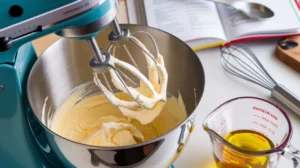
Incorporate the eggs one by one, ensuring each is fully blended before adding the next. Then, mix in vanilla extract. Scrape down the sides of the bowl to make sure the ingredients are well combined.
Pour in half of the flour blend and stir on a low setting. Then, slowly add the milk and mix until smooth. Finally, add the remaining flour mixture and combine until just incorporated. Stir with a spatula to finish mixing.
Transfer the batter into the prepared pan and level the surface. Bake for 25-28 minutes, or until a toothpick inserted into the center comes out clean and dry. Allow the cake to cool in the pan for 10 minutes, then move it to a wire rack to cool completely.
Nutrition
- Serving Size: 6
- Calories: 250 kcal
- Sugar: 18g
- Sodium: 150mg
- Fat: 12g
- Saturated Fat: 6g
- Unsaturated Fat: 4g
- Carbohydrates: 35g
- Fiber: 1g
- Protein: 3g
- Cholesterol: 50mg
Frequently Asked Questions
Can I cover my cake immediately after baking?
It's best not to cover your cake immediately after baking.Let it cool down fully on a wire rack before proceeding. Covering a warm cake traps steam, which can make the cake soggy and affect its texture. Once the cake has cooled to room temperature, you can wrap it tightly in plastic wrap or place it in an airtight container to preserve freshness and moisture. If you're planning to frost the cake, ensure it is fully cooled to prevent the frosting from melting.
Do you grease mini loaf pans?
Yes, it's recommended to grease mini loaf pans before pouring in the batter. Greasing ensures that the cakes come out easily after baking. You can grease the pans with butter, oil, or use non-stick cooking spray. For extra insurance, you can also line the pans with parchment paper, especially if you're working with delicate batters. This helps prevent sticking and makes cleaning up much easier.
When to remove parchment paper from the cake?
You should remove parchment paper from the cake after it has cooled slightly but is still warm, typically about 10-15 minutes after baking. Allow the cake to cool in the pan for this short time, then gently run a knife around the edges to loosen it. Carefully invert the cake onto a cooling rack, peel off the parchment paper, and let the cake finish cooling completely. Removing it too early can cause the cake to break, while waiting too long may make the parchment paper stick to the cake.
What’s the best way to prevent mini cakes from becoming dry?
To keep mini cakes from drying out, avoid overbaking by checking for doneness early, as they bake faster than larger cakes. Use moisture-rich ingredients like sour cream or buttermilk in the batter, and brush the cakes with simple syrup after baking for added moisture. Store them in an airtight container or wrap individually in plastic wrap to prevent air exposure. Frosting or glazing the cakes helps seal in moisture, while refrigeration, if necessary, should be done with tight wrapping to avoid drying from cold air. Always serve at room temperature for the best texture and flavor.
Conclusion
Mini cakes bring together flavor, creativity, and convenience in a delightful package. Their petite size allows for endless flavor combinations and intricate decorations, making them a showstopper for any occasion. Whether you’re preparing a rich chocolate variety or experimenting with a mini vanilla sponge cake recipe for one, these cakes deliver all the indulgence of a full-sized dessert in a perfectly portioned format.
Beyond their delectable taste, mini cakes shine as visually appealing desserts that eliminate the need for slicing. Each guest receives a beautifully crafted treat, making them ideal for events of all sizes. While recipes like Strawberry Candy bring sweetness in their own way, mini cakes offer versatility and charm, leaving a lasting impression with their customizable designs and flavors. Their timeless appeal makes them a favorite among dessert lovers everywhere.
Leave a comment
Your email address will not be published. Required fields are marked *